Savage axis-Boyds stock build.

Status
Not open for further replies.

Axis II

Member
Joined
Jul 2, 2015
Messages
7,179
I came upon a 15% off coupon for a Boyds stock and about $20 in cash back rewards so I took the plung. I ordered the classic in pepper because that's what seems to fit me best. I placed the Boyds along the axis factory stock and LOP seemed to be identical but after shouldering the Boyds with the action in place I need to add a grind to fit recoil pad for more LOP.

My first impression was the stock was very well made until I started going over it with a fine tooth comb. I noticed small spots of brown which appears to be glue or filler and a line of brown laminate around the trigger guard. You really cant see the issues unless your right on top of them but for $155 you would think there wouldn't be the minor flaws. I noticed the inletting was very rough both in the action area as well as the trigger guard but the action seemed to fit in there just fine but my buddy thinks its too loose so wants to pillar and glass bed it. One other issue I noticed was the comb seems to be a hair lower than my axis OEM stock so I will need to get a slip on cheek rest pad or attempt lower rings.

Another issue I noticed is there is more black than gray in color. I had a nutmeg I returned to optics planet that was orange instead of brown. I emailed Boyds about getting a nutmeg in a darker color and got kind of a crappy response back that laminate stocks are thousands of layers of wood and they don't have the time or resources to darken them and how each layer soaks the stain differently.

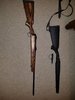
I think it will be a good improvement over the OEM stock and for the price I paid I'm happy. I will post some pics tomorrow.
 
Last edited:
Victor cheek riser. Screw it to the top of the comb, easy peasy, solid, cheap, and without hassle.

Did you measure yourself for LOP before ordering?

Definitely block and bed.
I did not. The factory stock fit me decently. I'm going to throw a grind to fit pad I have laying around on there to give me the extra inch or so.
 
Victor cheek riser. Screw it to the top of the comb, easy peasy, solid, cheap, and without hassle.

Did you measure yourself for LOP before ordering?

Definitely block and bed.
I totally forgot about that riser you told me about. I haven't shot it off the bags yet so going to see how it goes prone and on bags. I do have to remove some material from barrel channel as a dollar bill was very tight and grabbed near the barrel nut. My buddy said i should be able to slide a piece of card stock between there for good measure. I'm going to see how she shoots now and if i get the one hole wonder with those Nosler's like i did before i may leave it alone.
 
Your buddy is headed in the right direction, but in my experience, not going far enough. Most card stock is 10-20thou, whereas I typically want my free float relief in the 25-50 thou ballpark. Call it 1/32” to 1/16” for good measure. The relief isn’t just to eliminate contact - which it is - even during stock flexion, but also to allow convective air flow, so one part of the barrel isn’t insulated to become hotter than the other. A dollar bill is about 4thou, so I want at least 5 bills stacked to clear without snags, or 3 sheets of 10pt cardstock.

The job is MUCH easier than it seems, however, as you don’t really have to relieve the forend, just let your bedding job give you the relief you want. Get some 2” wide electricians tape, and layer it onto the barrel to your desired relief thickness when blocking and bedding. Doing so will seat the barrel into the channel with the appropriate relief left behind when your pillars are cured and the tape removed. I use bedding Black (or gold) to ensure I have relatively even contact down the barrel, then skim bed the barrel channel with the tape in place to bring it to a nice, consistent gap throughout the forend. For your Boyd’s, go back with the dremel after and clean out the spill into the weight reduction cut in the barrel channel, just for good measure (unless you want some forend weight to ride the rest better, in which case fill it with devcon steel or embed lead shot into the groove as you bed). Some guys wrap the barrel with normal 1/2” electricians or masking tape, rather than layering the entire barrel. I like to layer the wide tape so I can bed (and seal) the channel - can’t do that with traditional wraps.
 
Laminate wood is an attempt at making a cheap good stock. There will be a few imperfections.
I had good results with Boyd's stocks.

If you follow Varminterror's advice, you will be pleased.
 
Your buddy is headed in the right direction, but in my experience, not going far enough. Most card stock is 10-20thou, whereas I typically want my free float relief in the 25-50 thou ballpark. Call it 1/32” to 1/16” for good measure. The relief isn’t just to eliminate contact - which it is - even during stock flexion, but also to allow convective air flow, so one part of the barrel isn’t insulated to become hotter than the other. A dollar bill is about 4thou, so I want at least 5 bills stacked to clear without snags, or 3 sheets of 10pt cardstock.

The job is MUCH easier than it seems, however, as you don’t really have to relieve the forend, just let your bedding job give you the relief you want. Get some 2” wide electricians tape, and layer it onto the barrel to your desired relief thickness when blocking and bedding. Doing so will seat the barrel into the channel with the appropriate relief left behind when your pillars are cured and the tape removed. I use bedding Black (or gold) to ensure I have relatively even contact down the barrel, then skim bed the barrel channel with the tape in place to bring it to a nice, consistent gap throughout the forend. For your Boyd’s, go back with the dremel after and clean out the spill into the weight reduction cut in the barrel channel, just for good measure (unless you want some forend weight to ride the rest better, in which case fill it with devcon steel or embed lead shot into the groove as you bed). Some guys wrap the barrel with normal 1/2” electricians or masking tape, rather than layering the entire barrel. I like to layer the wide tape so I can bed (and seal) the channel - can’t do that with traditional wraps.
Dumb question..

If i wrap the electrical tape say 2x thick wont this make the pillars longer than being flush with the wood or does this not matter?

When you say skim bed do you mean put acraglass in the barrel channel?

If I understood this correctly i should find 2'' wide electrical tape and wrap the barrel from the recoil lug to the end of the stock as thick as i want the free float? Doing this will raise the action ever so slightly keeping it free floated and the action will ride on the pillars apposed to the inletting of the stock? Once the pillars are cured glass bed the action for a more uniform free float.
 
Lay the tape along the barrel like applying wallpaper. Add layers to get to your desired thickness. If this raises your action out of the inlet, then relieve the barrel channel slightly to bring it back down to contact before you start. The wood surface will become irrelevant once the pillars are placed - you’ll relieve the action inlet to make room for the epoxy once the pillars are installed. But you don’t want the rifle to raise out of the inlet just to clear the barrel.

Yes, Glass the entire barrel channel, with the layered tape in place. This seals the barrel channel, gives a consistent relief around the barrel, and offers a less resistant air channel for convection to let heat homogenize around the barrel.

Here’s what I do, as I was shown by a gunsmith under whom I apprenticed 20yrs ago whose specialty was sporterizing Mausers for benchrest shooters, then revisited and confirmed in conversations with Boyd Allen (International Benchrest Shooters VP) about a decade ago:


Starting with a fully inlet stock:

  1. Disassemble the rifle and action – I personally remove everything I can from the action, some guys like to blind off their trigger and leave them installed during this job, I don’t, I remove everything.
  2. Layer multiple layers of 2” tape on the bottom and sides of the barrel to 25-50thou thickness. I use electrical tape for tapered barrels, but masking tape works just fine for heavy barrels.
  3. Confirm the fit of the layered barrel into the barrel channel, confirming depth with bedding black, or bedding gold, depending upon your stock color – Relieve the stock if the layered barrel won’t seat easily into the barrel channel, and eliminate any small high spots.
  4. Drill out the action screw bores with a piloted counter bore of an appropriate size to the pillars to be used.
  5. If necessary, rough and/or groove the exterior surface of the pillar to allow good purchase for the bedding compound
  6. Thoroughly degrease the pillars
  7. Attach the pillars to the action with stock makers screws, using a 5-10thousandths shim between the action and the pillar. (normal machine screws wrapped in tape to center them in the pillar can work here)
  8. Tape several layers thick the bottom, front, and sides of the recoil lug (some guys want the sides to make contact, I do not – I want the sides of my ACTION making contact, and the recoil lug to ONLY contact on the rear face).
  9. Tape mask or fill with modeling clay any voids in the action – trigger hangers, mag cut, casting recesses, etc
  10. Thoroughly coat the action and layered barrel with release agent
  11. Tape off the topline and sides of the stock and thoroughly coat with release agent
  12. Coat the pillars with bedding compound, generously, then place into the stock – hold in place either with surgical tubing, or I prefer multiple wraps, front and back, of electrical tape to keep consistent tension.
  13. Release the tubing/tape tension after 8hrs, let cure for 24-36hrs before removing the action from the pillars
  14. Relieve the action area sufficiently around the pillars and rough the inlet surfaces and barrel channel, being careful to not gouge or misshape your topline, ejection port recess, bolt handle groove, etc.
  15. Recoat the action and layered barrel with release agent
  16. Retape if necessary and recoat the topline and sides of the stock with release agent
  17. Skim bed the entire action and barrel channel, being careful to not cover over the pillars with epoxy AND remembering to replace your 5-10thou shims back on the pillars as you reinstall the barreled action into the stock. I torque to my 40-45ft.lbs. (for rem styles) at this point, then relieve to about 20lb after 8hrs. Wipe away what you can of
  18. Remove the action after another 24-36hrs, clean up any of the over-fill
  19. Remove the pillar shims, remove the clearance tapes, and test fit your action (best done with a mag base indicator)
  20. Use a facing reamer to cut the pillar flush in the bottom metal inlet
  21. Thoroughly coat the bottom of the stock and the bottom metal with release agent
  22. Skim bed the bottom metal into the inlet by placing the same 5-10thou shims on top of the pillars.
  23. Clean up, reassemble, shoot small


I do not run any “support pad” under the chamber of typical bolt action rifles. I have done so in the past, and I don’t find it to produce as good of product. This would include taping off and ensuring clearance of your barrel nut on your Savage (another reason to use electrical tape rather than masking tape as your clearance control, as electrical tape will stretch to fit the barrel nut and contour better than masking tape).


I do NOT believe any of the old school BS about “pressure pads at the forend tip,” not even for sporter weight barrels. It’s like giving aspirin to treat brain cancer – if your barrel is walking when it gets hot, it means you either have uneven pressure/contact (could be stock contact, uneven receiver face, or uneven barrel shoulder), or you have irregular stress in the barrel itself. That’s bad gear, and a pressure pad doesn’t fix bad gear.


This method will ensure the pillars do not create pressure points on the action as the epoxy shrinks during curing, and will ensure proper barrel channel relief, AND will seal the barrel channel, which will help eliminate future potential for moisture warp. The action itself will ensure lateral and vertical alignment consistency in the bedding, then the only job of the recoil lug is to retain consistent contact on the rear face. I’ve done jobs where I’ve not used the shims and left the action and bottom metal touching the pillars, so I had 100% metal contact all the way through the stock, but I haven’t been as satisfied with the results. It’s much like standing on the roof of a pole barn – you’re not standing directly on the load bearing pole (the pillars), but rather, you’re supported by the roof sheeting and rafters (the bedding). Rather than standing on top of a pair of fence posts.
 
Well I couldn't wait to get out and see how my new Boyds stock did so I loaded 10 rounds of my good load and 5 rounds about 3 tenths from max. My first 10 rounds shot terrible compared to how they were with the factory stock but the 5 shots with the hotter load put 4 in the same hole with one flier. I did have to adjust the scope a bit so I'm wondering if it just wasn't the scope that needed a little breaking settling down. I still plan on pillar bedding it and glass bed too.
 
I forgot to add . I am sitting on a bunch of ammo . It was bought for a gun it didn’t take in . So I never played with the scope I just let it come in . The accuracy is good enough for me but if I do my 270 Stevens I will be bedding it
 
Lay the tape along the barrel like applying wallpaper. Add layers to get to your desired thickness. If this raises your action out of the inlet, then relieve the barrel channel slightly to bring it back down to contact before you start. The wood surface will become irrelevant once the pillars are placed - you’ll relieve the action inlet to make room for the epoxy once the pillars are installed. But you don’t want the rifle to raise out of the inlet just to clear the barrel.

Yes, Glass the entire barrel channel, with the layered tape in place. This seals the barrel channel, gives a consistent relief around the barrel, and offers a less resistant air channel for convection to let heat homogenize around the barrel.

Here’s what I do, as I was shown by a gunsmith under whom I apprenticed 20yrs ago whose specialty was sporterizing Mausers for benchrest shooters, then revisited and confirmed in conversations with Boyd Allen (International Benchrest Shooters VP) about a decade ago:


Starting with a fully inlet stock:

  1. Disassemble the rifle and action – I personally remove everything I can from the action, some guys like to blind off their trigger and leave them installed during this job, I don’t, I remove everything.
  2. Layer multiple layers of 2” tape on the bottom and sides of the barrel to 25-50thou thickness. I use electrical tape for tapered barrels, but masking tape works just fine for heavy barrels.
  3. Confirm the fit of the layered barrel into the barrel channel, confirming depth with bedding black, or bedding gold, depending upon your stock color – Relieve the stock if the layered barrel won’t seat easily into the barrel channel, and eliminate any small high spots.
  4. Drill out the action screw bores with a piloted counter bore of an appropriate size to the pillars to be used.
  5. If necessary, rough and/or groove the exterior surface of the pillar to allow good purchase for the bedding compound
  6. Thoroughly degrease the pillars
  7. Attach the pillars to the action with stock makers screws, using a 5-10thousandths shim between the action and the pillar. (normal machine screws wrapped in tape to center them in the pillar can work here)
  8. Tape several layers thick the bottom, front, and sides of the recoil lug (some guys want the sides to make contact, I do not – I want the sides of my ACTION making contact, and the recoil lug to ONLY contact on the rear face).
  9. Tape mask or fill with modeling clay any voids in the action – trigger hangers, mag cut, casting recesses, etc
  10. Thoroughly coat the action and layered barrel with release agent
  11. Tape off the topline and sides of the stock and thoroughly coat with release agent
  12. Coat the pillars with bedding compound, generously, then place into the stock – hold in place either with surgical tubing, or I prefer multiple wraps, front and back, of electrical tape to keep consistent tension.
  13. Release the tubing/tape tension after 8hrs, let cure for 24-36hrs before removing the action from the pillars
  14. Relieve the action area sufficiently around the pillars and rough the inlet surfaces and barrel channel, being careful to not gouge or misshape your topline, ejection port recess, bolt handle groove, etc.
  15. Recoat the action and layered barrel with release agent
  16. Retape if necessary and recoat the topline and sides of the stock with release agent
  17. Skim bed the entire action and barrel channel, being careful to not cover over the pillars with epoxy AND remembering to replace your 5-10thou shims back on the pillars as you reinstall the barreled action into the stock. I torque to my 40-45ft.lbs. (for rem styles) at this point, then relieve to about 20lb after 8hrs. Wipe away what you can of
  18. Remove the action after another 24-36hrs, clean up any of the over-fill
  19. Remove the pillar shims, remove the clearance tapes, and test fit your action (best done with a mag base indicator)
  20. Use a facing reamer to cut the pillar flush in the bottom metal inlet
  21. Thoroughly coat the bottom of the stock and the bottom metal with release agent
  22. Skim bed the bottom metal into the inlet by placing the same 5-10thou shims on top of the pillars.
  23. Clean up, reassemble, shoot small


I do not run any “support pad” under the chamber of typical bolt action rifles. I have done so in the past, and I don’t find it to produce as good of product. This would include taping off and ensuring clearance of your barrel nut on your Savage (another reason to use electrical tape rather than masking tape as your clearance control, as electrical tape will stretch to fit the barrel nut and contour better than masking tape).


I do NOT believe any of the old school BS about “pressure pads at the forend tip,” not even for sporter weight barrels. It’s like giving aspirin to treat brain cancer – if your barrel is walking when it gets hot, it means you either have uneven pressure/contact (could be stock contact, uneven receiver face, or uneven barrel shoulder), or you have irregular stress in the barrel itself. That’s bad gear, and a pressure pad doesn’t fix bad gear.


This method will ensure the pillars do not create pressure points on the action as the epoxy shrinks during curing, and will ensure proper barrel channel relief, AND will seal the barrel channel, which will help eliminate future potential for moisture warp. The action itself will ensure lateral and vertical alignment consistency in the bedding, then the only job of the recoil lug is to retain consistent contact on the rear face. I’ve done jobs where I’ve not used the shims and left the action and bottom metal touching the pillars, so I had 100% metal contact all the way through the stock, but I haven’t been as satisfied with the results. It’s much like standing on the roof of a pole barn – you’re not standing directly on the load bearing pole (the pillars), but rather, you’re supported by the roof sheeting and rafters (the bedding). Rather than standing on top of a pair of fence posts.
Okay, I have some free time this summer, so i am going to attempt this but I need to pick this apart for more understanding.

3) What do you mean when you say confirm depth with bedding black? If it doesn't fit what am I relieving? Barrel channel, receiver area?
7) So attaching the pillars to the action screws and epoxying and setting into the barrel will give me the correct depth? My concern is when the barrel is taped wont it raise the action higher and make the pillars sit inside the stock making the screw heads hit the wood? I was debating on using these pillars. http://v3precision.com/front-magazine-clip-pillar-kit-savage-axis/ You kind of lost me with the machine screws. Are we using the action screws to hold the stock down or machine screws of the same diameter?
17) What do you mean by skim bed the entire action?
19) What is a mag base indicator?
20-22) totally lost.

Thanks for the info!
 
@ohihunter2014 - I parsed your post into the individual questions to better categorize the steps and hopefully explicate my process.

The process I described is meant to accomplish 3 things:

1) Free Float the Barrel
2) Pillar Block the action
3) Fully bed the action

With the following parameters:

A) All of the above without changing the vertical position of the action and barrel in the stock

B) 25-50thou off barrel free float for the entire length (more if you like, I often target 60)

C) No contact on recoil lug at sides, front, or bottom

D) No metal-to-metal contact between the action & pillars, such there are no pressure points - the bedding supports the action

3) What do you mean when you say confirm depth with bedding black? If it doesn't fit what am I relieving? Barrel channel, receiver area?

In this step, we are relieving the barrel channel. The idea here: I don’t want the action to move to a new “home” vertically in the stock after the bedding, as compared to before. Many guys just wrap tape a few layers thick around the barrel and bed the action first, but this method lifts the barrel out of the channel, as well as the action. Instead, I relieve the barrel channel to let the taped barrel fit into the inlet when the action is seated onto it’s normal/factory/original position.

Basic principle: the barrel AND action are touching the stock. Adding tape to the barrel will give you your desired free float, but the barrel will be sitting higher in the stock than it used to be (can be big problems for feeding!), and it brings the action with it. Instead, I want to relieve the barrel channel so the action goes back to its original position, with the relief taped barrel settled into the stock. When the tape is removed when everything is done, the desired freefloat gap will remain (thickness of the removed tape).

I use bedding black/gold to identify the high spots in the barrel channel as I relieve the inlet to bring the action back down to its original position.

7) So attaching the pillars to the action screws and epoxying and setting into the barrel will give me the correct depth? My concern is when the barrel is taped wont it raise the action higher and make the pillars sit inside the stock making the screw heads hit the wood? I was debating on using these pillars. http://v3precision.com/front-magazine-clip-pillar-kit-savage-axis/ You kind of lost me with the machine screws. Are we using the action screws to hold the stock down or machine screws of the same diameter?

I addressed the height and barrel channel relieving step above (hopefully). The process up to this point is focused on relieving the barrel channel to create the free float which will be left after the job is done, without changing the position of the action in the stock at all.

So in steps 7-13, we are setting the pillars. The pillars only. This is the “pillar blocking” part of the job.

The screws used in this step only serve two purposes: A) hold the pillars to the action, and B) center the pillars around the action screw. The surgical tubing or electrical tape will hold the action in the stock while the epoxy sets and cures. Basically, we are hanging the pillars from the action, coating them with epoxy, bottoming the action against the existing inlet, and letting the pillars harden into the stock. The screw heads used here have to pass through the bore holes in the stock. Wrapping tape around the shank of the screw will ensure the pillar is (roughly) centered around the screw once installed. Without tape, the pillar could be touching one side or the other of the screw, creating potential for torque against the action.

17) What do you mean by skim bed the entire action?

The pillars are set, the barrel will be free floating when the tape is removed, so the last step is to bed the action. We used the original action inlet to support the action while we set the pillars, now we’ll use the pillars to support the action while we bed the action. Once the pillars were set, we relieved the action area to make room for the bedding compound, then use the pillars to support the action while the bedding sets.

So in this step, we are coating the action inlet with compound, and squeezing the action down into it, bottoming on the shims on top of the pillars. When cured, we remove the shims, so then the action is setting on the bedding, not touching the pillars. We remove the barrel tape, which leaves the barrel free floating. The only remaining contact is the action sitting in the bedding.

(Option: I have a buddy who doesn’t use shims on the pillars, but instead, he mills the pillars after the bedding is done to relieve them below the surface of the epoxy. I prefer to NOT set up and cut again, and risk chipping my action bedding, but it works well enough for him).

19) What is a mag base indicator?

A magnetic base dial indicator. It’s a dial indicator mounted in an articulating arm with a magnetic base. We mount the magnet to the barrel and indicate the dial on the stock forend tip, support the muzzle and the buttstock (build a bridge) of the rifle, then loosen the action screws. If the bedding job is good, the dial indicator won’t move until the screw is almost or is completely loose. If it is bad, the dial will show movement as soon as you start loosening the screw. Meaning the action is moving in the stock.

7C720809-6E2C-497F-940C-DF35E93CCBD5.jpeg

20-22) totally lost.

These steps describe relieving the bottom metal and skim bedding the bottom metal, connecting the epoxy to the pillars on the bottom side, without metal-to-metal contact against the bottom metal, just the same as we did on the action side in the previous steps.
 
Status
Not open for further replies.
Back
Top