Tale of Two S&W 38 Double Actions

I would heat it with a torch, swage it, and let it cool naturally.

That I can do. I think I can do that without Jackrabbit's special tool. Though I'm kind of interested in seeing how the tool works.

Thanks.
 
I would be interested to see photos of the tool to identify if it is indeed the Jack Gutridge tool or something else like the Power Custom. The Gutridge tools are rare and serial numbered. Unfortunately both Jack and his son Eric have passed, so there are no more of those to be had.
 
I spent the day yesterday cleaning up some unfinished business on a couple of projects. Some things just nag on me. While searching for an unrelated part I found another hand for my 38 DA. This one was 0.010" taller than the one that was in the revolver. And now it always makes it to lock up no matter how slowly the action is operated. This 120 plus year old firearm now functions as it did the day it was manufactured. There is a sence of satisfaction knowing there isn't anything that doesn't function right because of its age. Lord knows I've got my share of firearms that have that 'quirk' A Savage 1915 pump 22 that I have to roll counterclockwise 30 degrees to reliably pump as an example. So for now I don't need to stretch my existing hand @Jackrabbit1957 . Though I do want to see how it works.

https://photos.google.com/photo/AF1QipMwuit4iqnxrUYnKL4TMG_cgwwA89MnPowjK7Bz

Let me know if this link doesn't work.

A short, poor video of today's success.
 
In keeping with the original thoughts of this thread, to disclose what I learned along the way, I did learn or relearn that there is a sequence to putting these things back together again. In this case it was a matter of forgetting the written instructions. Chiccone’s book contains detailed instructions. One has to remember that the rear sear spring has to be installed after the hammer is put in place. Otherwise, the hook on the rear seer will be pushed below the hook on the cylinder stop. It took four or five tries to remember that last night.
 
Last edited:
I spent the day yesterday cleaning up some unfinished business on a couple of projects. Some things just nag on me. While searching for an unrelated part I found another hand for my 38 DA. This one was 0.010" taller than the one that was in the revolver. And now it always makes it to lock up no matter how slowly the action is operated. This 120 plus year old firearm now functions as it did the day it was manufactured. There is a sence of satisfaction knowing there isn't anything that doesn't function right because of its age. Lord knows I've got my share of firearms that have that 'quirk' A Savage 1915 pump 22 that I have to roll counterclockwise 30 degrees to reliably pump as an example. So for now I don't need to stretch my existing hand @Jackrabbit1957 . Though I do want to see how it works.

https://photos.google.com/photo/AF1QipMwuit4iqnxrUYnKL4TMG_cgwwA89MnPowjK7Bz

Let me know if this link doesn't work.

A short, poor video of today's success.
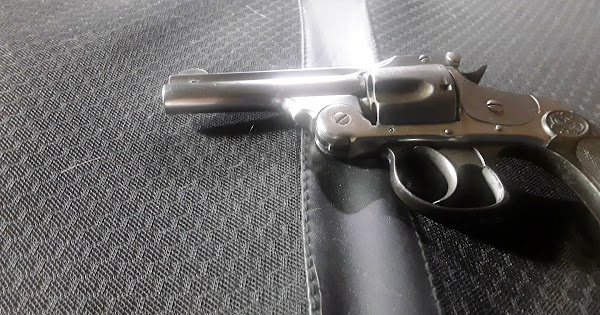
I just recently acquired a fixture to stretch hands, I really don't like to stretch one as for me actually welding up the end works best. If the hand is only a couple of thousands short then stretching it makes sense to me. For anyone interested my bench is more or less clear if you have a revolver that you would like tuned or repaired.
 
As i evaluate the functioning 38 DA I measured the end shake. A total of 0.014". The cylinder gap measures 0.006" at its closest and 0.020" at its farthest. That might explain the lack of a sharp report when firing.

In reality it doesn't seem difficult to keep the cylinder forward, the direction it needs to go. The back of the cylinder/ratchet has a center pin that fits into a recess in the recoil shield.

20230312_153013.jpg

20230312_153027.jpg

16786613989066007268207951628288.jpg

So it seems to me I can either fill the recess in the recoil shield or extend the center pin on the ratchet to force the cylinder forward. What I find by manipulating the cylinder forward and puling the hammer back is that the hand no longer reaches the ratchet teeth all the wzy up the travel of the hand and again the cylinder is left short of reaching lock up. So I will almost certainly have to stretch the hand. So @Jackrabbit1957 I'll probably be traveling to your place after I remove the excess end shake.

FYI - If you are familiar with how the cylinders are retained on a S&W top break revolvers, 0.006" cylinder gap is probably as small as I'll be able to achieve.
 
Well, that wasn't difficult. A copper bushing in the recess in the recoil shield and the end shake is now 0.002" . Cylinder gap now measures 0.006 to 0.008" . This fix is not the final fix. I dont expect the copper will withstand the battering of live fire. But at least it is proof of concept. I'm researching nickel plating kits and this revolver will end up re-nickeled.

16786708577013274012815376561039.jpg

Although the intent is get a kit to do an entire revolver I'm going to start with two of brush plating kits (copper and nickel) first. I want to practice filling small pits with copper plate first. And depending on how thick Ithe nickel brush plating kit will apply, the intent here is to build up the recess brush plating it with nickel before plating the revolver frame.

But it does work now. I can't feel the 0.002" end shake and even though my initial testing indicated that once the end shake was corrected that the hand would be too short to bring the cylinder to lock up, But that isn't the case. It still locks up as well as it did previously.
 
Edit to add: I'm hoping Mr. @Driftwood Johnson will read this. I know he has several S&W Double actions and is familiar with their function.

It has been a while. But I'm able to focus on the first of the two 38 DAs I have. I have claimed that this revolver functions as it did the day it was made. That might not be completely true. Hopefully someone is willing to remove the sideplate from one of their 32/38 DAs to help me confirm the orientation of parts at half cock.

I'm going to cut to the question first and maybe someone who knows how these double actions work will have the answer.

How far back does the hammer stay when in half cock? And when in half cock does rotating the now free wheeling cylinder produce the 'click' as it passes over the hand?

Below are details for those not familiar with the old S&W DA action.

Recall there is a really good animation of the function of all of the DAs here:

S&W 38 DA 3D anim - YouTube

Consider that the animation doesn't show the interaction of the hammer fly and the rear sear. This is a detail that isn't really necessary to show how the action works. But it is the subject of my question.

Although the action does retract the hammer/firing pin when in half cock, I don't think the hammer is as far back as it was when it was new. I think this is the result of installing a new hammer fly on my hammer. The old one was broken. As with most parts from Jack First, I believe the hammer fly came 'over sized' and I did no fitting of the hammer fly when I installed it. It did improve the action considerably when I installed the new hammer fly.

Here is a picture of the hammer fly installed on the hammer. It is the small piece of what looks like a flat piece in a slot on the bottom of the hammer. It is spring loaded with a tiny/tiny spring that can't be seen.

Screenshot_20230429-104040_Drive.jpg

Here is a picture of what my revolver looks like when in half cock. This is with the new un-fitted hammer fly in place
Not Held at Halfcock.JPG

Notice how the tip of the rear sear is at the very bottom of the half cock notch/hammer fly. In this position the hammer/firing pin are retracted enough so that the firing pin no longer protrudes beyond the face of the recoil shield. In this position the cylinder will rotate freely as it should but it does not 'click' as the ratchet teeth pass over the hand (pawl) and the cylinder can be rotated in either direction.

Now, when in half cock if I pull the hammer back a little bit more I can hear the hammer fly 'click' into position. By rotating the cylinder, the ratchet teeth do contact the hand (pawl) and click and the hand prevents the cylinder from being rotated backwards. I think this is the way it should be. Notice in the below picture the tip of the rear sear is now much 'higher' in the half cock notch and the hammer fly has deployed.

Held at Halfcock.JPG

And here is a picture of the hammer as I am holding the action in what I think is the proper place. Notice that the hammer is noticeably further back. Sorry, not a very good picture. But the hammer now looks like it is retracted.

Held at half cock hammer.JPG

So a more detailed question is if anyone thinks that the hammer fly should be fitted to allow the rear sear to sit up higher in the half cock notch? This would by geometry keep the hammer further back.

The second part of that question is how would I fit the hammer fly to accomplish this? Should it have a backwards slope to allow the tip of the rear sear to 'catch' on the hammer fly? Or maybe the flat face of the hammer fly needs to be trimmed straight back?

If the video above doesn't help orient you, here is a picture of the parts assembled on the outside of the gun the kind of helps give a picture of how the parts interact. again, not a very good picture as the glare tried to hide the cylinder stop and the rear sear.

parts outside.jpg
 
Last edited:
interesting work. I'd like one of those someday myself. this guys does a pretty detailed assembly. If I was working on that I'd end up watching a bunch of videos like this, I usually will skip around to look for exactly what I'm trying to figure out, but overall - he works the firearm and covers some details about some assembly tricks and how the parts look like they are supposed to fit and work. Smith & Wesson .38 DA/SA Top Break Disassembly and Reassembly Part 3 - YouTube

I don't know that firearm, but for a half cock or full cock for that matter as long as the hammer catches correctly and can not be pushed off with your thumb, like any revolver with a hammer, I don't think there is anything that needs fixing. If it works right, it works right.

I've watched all 3 of his videos on the subject. Unfortunately he never function tests the half cock. I'm a lot like you and search the internet for anything on the subject. I also found a video by our own @Michael Tinker Pearce on the 44 DA. But I'm not sure if the 44 DA has the same half cock feature. The 44 DA was the start of the DA series and didn't have as many of the engineering changes as the 32 and 38 DAs. I suspect because of the much lower production numbers.
 
I don't know that firearm, but for a half cock or full cock for that matter as long as the hammer catches correctly and can not be pushed off with your thumb, like any revolver with a hammer, I don't think there is anything that needs fixing. If it works right, it works right.

Well, there's a bit of OCD at work here.
 
Well, @Michael Tinker Pearce is off the hook unless he has a later model 32 or 38 DA. If I'm reading Chiccone's book correctly, the 44 DA doesn't have a hammer fly. It just uses a standard half cock notch.

Chiccone implies that the 44 DA didn't go through the design changes that the more popular 32 and 38 DA's went through never updated beyond the second change. That's why the 44 DA's still have the double stop notches but the irregular side plate. I suspect that after the change from square side to irregular side plate all of the receivers and or major parts for the 44 DA were made. Of course that wouldn't explain the change to the longer cylinder/frame for the Frontier model. S&W changes can be maddening.

The hammer fly was a change made in the 32 and 38 DA's. Though I've never seen when that change was made. I wish there was more written about the function of the hammer fly. I read somewhere that the hammer fly was added in response to damage to either the half cock notch or the rear sear (or both). Though I can't remember where I read that.
 
I didn't think my last question was going to be this difficult. But apparently it is. There were probably a half of million of this exact model built and I assumed that someone here would have one. Maybe not.

I can simplify the question by asking anyone who has a good functioning 32 or 38 DA to take a picture of the hammer position after firing (firing pin protrudes beyond the face of the recoil shield) and a photo of the hammer after it has been put into 'half cock'. this would give me an idea of how 'far back' the hammer is when in half cock. The second part of the question would remain the same. When in half cock does rotating the cylinder produce a clicking sound. we are all familiar with from most single action revolvers?
 
A fly is intended to prevent damage to the half cock notch. I personally have never seen one on a revolver. The fly should allow the hammer to engage the trigger at half cock but allow it to skip over the half cock notch as the hammer falls from full cock. As to the clicking sound at half cock when turning the cylinder, that is the tip of the hand sliding off the ratchet teeth at the rear of the cylinder. I don't know enough about your S&Ws to give a real educated answer on how the hand engages the ratchet. I think you should hear something as the cylinder is turned.
 
A fly is intended to prevent damage to the half cock notch. I personally have never seen one on a revolver. The fly should allow the hammer to engage the trigger at half cock but allow it to skip over the half cock notch as the hammer falls from full cock. As to the clicking sound at half cock when turning the cylinder, that is the tip of the hand sliding off the ratchet teeth at the rear of the cylinder. I don't know enough about your S&Ws to give a real educated answer on how the hand engages the ratchet. I think you should hear something as the cylinder is turned.

Is the "click" from the bolt dropping into the cylinder groove to lock the cylinder from turning?
 
A fly is intended to prevent damage to the half cock notch. I personally have never seen one on a revolver. The fly should allow the hammer to engage the trigger at half cock but allow it to skip over the half cock notch as the hammer falls from full cock. As to the clicking sound at half cock when turning the cylinder, that is the tip of the hand sliding off the ratchet teeth at the rear of the cylinder. I don't know enough about your S&Ws to give a real educated answer on how the hand engages the ratchet. I think you should hear something as the cylinder is turned.

Thanks JR. I sort of understood the concept. Thanks for the clarification. FYI - In the case of the S&W DA's, there is a 'Rear Sear' that engages the hammer instead of a part of the trigger. The rear sear also engages the single action notch in the rear of the hammer. There is actually a front sear that controls the double action release and engages a notch on the front of the hammer. They are weird compared to a Colt or modern double action. The design is a bit 'cludgy' compared to a modern double action.

Other than to know how it is supposed to work, I am not really trying to get to a clicking sound. Remember that when I put my hammer at half cock the firing pin is retracted a safe amount but the cylinder freewheels in both direction and no clicking sound. In this condition the rear sear rests on the half cock notch with the hammer fly pushed out of the way. . But if I pull the hammer back a little further the spring loaded hammer fly deploys and the hammer would now rest on the hammer fly instead of the hammer. In this condition the hand is extended a little further and makes contact with the ratchet teeth and makes the clicking sound.

So if a known good working example clicks, that tells me how far back the hammer should be at half cock. And that would tell me if the rear sear should rest on the hammer or the hammer fly at half cock. My rear sear currently rests on the hammer at half cock. If my rear sear rested on the hammer fly i stead of the hammer, the hammer would be pulled further back then it is now.

Is the "click" from the bolt dropping into the cylinder groove to lock the cylinder from turning?

As Jackrabbit noted, the clicking sound are the ratchet teeth passing over the extended hand.
 
Well, this is a 'Tale of Two S&W 38 DA's'. I've started on the second 38 DA. In reality I started a couple of years ago with this frame and got it to function perfectly (I thought) through my function tests. When I brought it out to the field to function test it with live ammo I found the cylinder would bind the cases against the recoil shield. Lesson Learned: Function test with empty cases before you get to the field. The Base Pin, some call it a quill, was bent and the gap between the back of the cylinder and the recoil shiel was visibly narrower at the bottom/one side compared to the other. My fix was to use the largest pin punch that as closely matched the inside diameter of the base pin and lightly bend it in the direction it needed to go. This got if very close to correct, enough that the visible discrepancy pretty much disappeared but the cases would still bind a little. The final answer was to remove a very little amount of material from the front of the cylinder where it indexes.
Cylinder Fix.jpg Cylinder Fix 1.jpg
I'm pretty sure I used a larger diameter pin punch to straighten the base pin. But you get the idea.

The act of 'bending' the base pin left some 'irregularities in the inside diameter of the base pin that I had to polish though this wasn't enough to allow the extractor rod to pass through without rubbing. So I polished the outside diameter of the extractor rod using a course fiber sanding wheel on my bench grinder. It doesn't take off a lot of material but it does remove material. Function is normal now.

I've installed the cylinder stop but have reached the end of this work until I get some new parts. As I looked at the hammer I have I can see that someone has recut the single action notch and not very well. It will never work. The re-cut is at the wrong angle and in the wrong location. Not by much, but enough it will never work. Hammers are available. As I look at it, the rear sear I have looks pretty worn. This model was built with a hammer fly and of course the hammer fly was broken. I understand that tends to eat up the surface of the rear sear. So I'll probably have to buy a new one of those. Fortunately they are readily available.

The reason I wanted to restore this one first was the condition of the nickel. Although there are a couple of significant blemishes, it just looks good. I suspect the gun was re-nickeled at some point. The latch on it is nickeled and they never left the factory that way.

Second 38 DA Start.jpg
 
Last edited:
It was a good day at the range this weekend.

https://photos.app.goo.gl/36iJjgbqjmUrpsxK8

I need to tweak this one a bit. I find that if I apply enough force I can push this one off. But I'm pretty happy with the results.

3F51BEDF-C89B-4505-A9EE-CA977D9C666F.jpeg

The parts to complete the second 38 DA should arrive this weekend.
 
Last edited:
EDIT: I tried to access the videos from another device. Apparently the links don’t work. I’ll try to fix that later today.
 
Progress on the second 38 DA is moving along. It has/had issues. The major issue was the center pin was bent and I had to straighten it. That was mostly successful but the front of the cylinder had to be shortened to allow the loaded cases to pass the recoil shield. This too was mostly successful though I won't be able to claim success until I can reliably turn the cylinder and position the charge holes in front of the forcing cone. I'm not there yet on this issue as I have another hand on the way to finish timing the revolver. I'm also having issues holding at full cock on this one. I'll likely not focus on that issue until the timing issue is resolved.

One thing at a time. And hopefully I'm working on the issues in the proper order!

I did have another work around that was successful that I'd like to share. This one will be a little hard to describe. Everything I describe in these posts make absolutely perfect sense to me as I've stared at these parts intently and disassembled/reassembled countless times. So bear with me if I gloss over something that appears completely obvious to me but is alien to others. Call me out on things like this. If nothing else, technical writing can't be improved without feedback.

We'll call this issue the cylinder stop spring force issue. The cylinder stop would not return to the up position.

So to start, the cylinder stop is a spring. Below you can see the cylinder stop and the rear sear out of the gun in there general relationship to each other. Both the 32 and 38 DAs use a cylinder stop that is actuated by an extension of the rear sear. This change started at the third model and removed the double stop notches on the cylinder.
20230626_180927.jpg

In the below photograph only the cylinder stop is installed. In a properly working revolver if one pushes down on the stop it will rebound back upward when force is removed because it is spring. It only moves down based on a dance with the rear sear and the sears position on the contour of the hammer.
16878289655211468124344375058252.jpg

Below is how the cylinder stop is installed with a pin to 'pin' it in place. But that requires that the cylinder stop sits flat for its entire length when pinned in place to hold the cylinder stop rigidly in place. In my case the 'flat' between the retaining pin and the short side of the opening in the frame was not flat but had a 'dip' in it so when the cylinder stop was pushed the cylinder stop just rotated down and because the flat between the pin and the short side of the opening had a dip in it, that part that should have been pushed up against the flat but could now rotate a littje, the cylinder stop just got pushed down and had nothing to 'spring' against. Kind of a see saw action occurs when the cylinder stop should be held rigid.
16878292300122067588805902780727.jpg


Oddly, I think this was a manufacturing defect. I could see where the Machining bit that cut the inner slot got too deep and as the revolver or Machining bit began to move it kind of "rolled up" to the correct position creating the dip.

Now if I were a gunsmith I believe the right answer would have been to bed that area with Accra glass. And I have acroglass, someplace. But what I had handy though was a product called "steel stick". Here is a picture of the final repair, and it works perfectly.

D8CDD18B-6449-4344-9388-77D71A3EBD26.jpeg

7CDD6B72-547E-4213-9ECF-843C185AFA63.jpeg

Now all I have to do is figure out the timing issues, holding on the full cock notch, and an annoying issue with the trigger not returning every time. The trigger return issue may be related to this work around as the trigger return spring installs directly on top of the cylinder stop.

That was a lot of words. Did I confuse you?

Here's a short video of the action at work (if I didn't butcher the video link)

https://photos.app.goo.gl/8v8oscHcRiCfMDzX9
 
Last edited:
I gave up on trying to straighten the base pin. Although I could get it straight enough on the outside so the cylinder functioned correctly, the inside has at least one bend in it that impacts the function of the extractor. Enough the extractor stumbles quite a bit. I found a nice 3 1/4" barrel in the white that has been polished ready for finishing. The lettering is in near perfect condition. Though I really liked the look of the 4" barrel that came on this one it had external finish issues with significant dents on the rib and obscured lettering. At some point one has to compromise.

I fitted the cylinder that serials to the frame but found that it wouldn't reliably hold on the cylinder stop. This frame, cylinder and original barrel were re-nickeled and apparently over polished. Fortunately I had another cylinder that fitted up well and times well.

The 3 1/4" barrel on the first 38 DA, and now this one, is the perfect proportion for the frame. It is small enough to still be a pocket pistol. But the 4" barrel on the same frame almost makes it look like a belt pistol. Maybe I'll get a 4" later.

Tom, the seller of the new barrel also has a hammer I'm arranging to acquire. That will get this one fully functional. Currently it is a double action only as someone tried to re-cut the full cock notch and butchered it. Remaining after the hammer is fitting a new sideplate as this frame never had one. I don't know how I'm going to fit it. I'm pretty sure there is an undercut involved that I don't have either the knowledge or tools to cut. But thats never stopped me from trying.
 
This is the second 38 DA. I've had the action working for a while except for a significant push off issue. Although I have 3hamers and sears all of the hammers were well worn or in one case bubb'd. I received a new parts kit today with a pristine hammer and matching sear. Now it can't be pushed off. This one is now also done mechanically. Both 38's and the 32 DA will get re-nickeled at some point in the future. Big learning curve on that front.


The action clicks are much more distinct on this 38. Though this one is a true parts gun. The barrel/cylinder native to this frame was not usable. The barrel/cylinder that arrived today match the finish of the frame better but I'd have some fitting to do to make it work. For now I'm done!
 
Back
Top