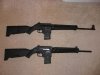
Cowitness at the same level is pretty much useless. Make your scope to supplement your iron sights. Not a problem for the Keltec. This is a nice value added feature.

ONE SHOT ZERO
1) Mount the scope accurately and securely. Use some blue locktite in the screws. Do not over tight. Make sure there is relieve in the
bottom (can use tiny plastic wrap to use as a shim on the rings) and make sure is leveled to the mount. When using a modern mount, a business card or something thinner, even paper should slide underneath, that way you know you are not bottoming out. Make the permanent scope is securely
attached to the rail. Use pressure washers and/or blue locktite if necessary. vibration from firing is the main case of out of zero failure. Do not over tight.
2) See if you can mount a 2nd scope using a 1 o'clock or piggy back mount for a 2nd small scope, small red dot or if not you will have
to do with the sights anyway. Ensure you can remove the 2nd scope or red-dot after done w/o disturbing the 1st and permanent scope.
3) Bring the ammo you normally shoot and sandbags or other firm support.
4) At the range Cover the target cardboard with white paper. 4 to 6 Letter papers will do. The key is that you see the whole target wherever it might hit. Then place a one dot 2 to 3 inches right in the middle. Use a gray, pink or light blue. Printed black might not allow you to see the hole if you hit it.
5) Place the target at 25yards. Make sure is in line with the back stop but not too high. The closest you can to the same plain level of the muzzle but obviously make sure of the range rules and it is in line with the backstop.
6) Use a laser boresight to get around the bulkpark area of impact and then after that remove the laser and place the rifle in the sand bags securely and aligned so the 1st and permanent scope is aiming at the target. Load and get ready.
7) carefully aim to the target bullseye in the center and make sure the rifle is fully stabilized. Use your crosshairs to zero on that target precisely. Then slowly initiate the shot. Shoot at the dot. Bang.
8) Now look for the actual point of impact. If you are right in the target then repeat the shot after a few minutes and see if that is the case by repetition but most likely after the first shot you will be off. Hopefully not too much so it will show somewhere in the white paper / target area.
9) now before you take the 2nd shot place the 2nd scope or red-dot and/or iron sights in the point of impact while maintaining the 1st scope in the dot.
Do not touch or adjust the 1st main scope! adjust only the 2nd system and irons until the 2nd systems and always irons are over the impact hole while the 1st scope aims exactly where you took the shoot to in the bullseye. It might take several adjustments of the 2nd scope and iron sights until both are where they should be. Verify several times. Take your time.
10) Ok. Now when the 2nd scope and iron sights are in the bullet hole and the main scope in the center target we are not going to touch the 2nd scope and irons anymore! They are exactly where we want them to be. Now adjust the 1st main scope only so the crosshairs overlap precisely whit the 2nd scope or red-dot and the iron sights. We want you to see through
the 1st scope precisely the same point as the 2nd scope or iron sights.
You can use any reference in the target. The bullseye for example as we want the 1st scope to land where the 2nd scope and irons are.
Verify this several times. Take your time.
When they match precisely all scopes and irons should be dead on or pretty darn close.
11) now it is time to take the shot again with the 1st main scope to the center dot. take your time. Use the sandbags again for stabilization and BANG!
12) By now you should be dead on. If not something went wrong and you have to repeat. I am suggesting a red-dot or even a cheap small scope as this will allow you to be more precise but anyway you are going to zero the iron sights as well anyway. As the bravo sights lack of quick adjustment I want you to adjust the iron sight a bit lower just over the tip of
the peep as the .223 will climb up to 125yards or so. I zero my iron sight to 125 yards.
By now you should right down the load, the yardage and then the adjustment in both the elevation and windage knobs.
Save all this notes for reference. The burris will keep a good zero if properly installed.
From here you could simply adjust to 200 yards and calculate the climb and drop in MOA. that Scope will give you 1/4MOA for every click.
Do not remove the 2nd scope until later in the day, It might come handy to compare before and after adjustment after you move up on every range.
I suggest to move in 25yards increments and write down the adjustment so that way you can map the elevation adjustment of your scope to the actual result. Hopefully it will not be windy so you can learn with only one variable only (drop) and leave windage for another day .
Anyway write down the wind and temperature in your log.
If you know your ballistics profile then all you need to do is to translate the inches to the MOA setting in your scope. The nice thing about the burris is that it is easy to make simple corrections up to 425yards using the compensation reticule and w/o using the elevation adjustments.
Let me know if you need help to converting the inches to MOA with this scope. I have done a little as I tend to spend more time with my long range systems than the carbines but the method is the same.
Cheers,
E.


")