How to make gun grips?

Status
Not open for further replies.

JCT

Member
Joined
Nov 3, 2007
Messages
446
Not sure if it's the right area, but since I only own BP firearms, it has some relevance.....
I've always wondered how gun grips are made and if I could do it myself. Any links or descriptions would be great. What tools are used...etc
I have wanted to be able to make figured grips for my Walker, Dragoon and SAA for awhile.
 
1. Get a block of wood.
2. Remove everything that isn't a grip. :D

Seriously, many normal woodworking tools and skills are all that are necessary.
Start out with perfectly matched pieces with at least two square edges.
Fit them to the frame first, the mark and trim the frame outlines.
Shape as required.
Finish with Tru-Oil.

Heres more:
http://www.thehighroad.org/showthread.php?t=414425&highlight=homemade+grips

http://www.thehighroad.org/showthread.php?t=369815&highlight=homemade+grips

http://www.thehighroad.org/showthread.php?t=326177&highlight=homemade+grips

rc
 
The best tip I can possibly give is to use the old grips as a template,so you'll be pretty close to the mark from the start.If you pencil trace and stay on or outside the pencil line,you should have just enough left over to sand to fit.
 
The one piece grips for the Colts are actually three pieces of wood, the two outside panel and a center spacer. A band saw makes cutting easier but a coping saw well get it done. A plainer if your working with raw logs so you can get a flat surface. Some wood rasps (files) and lots of sandpaper. Those 1X42 inch belt sanders take a lot of the hand work out fitting.

This link well help.
http://www.chipengelmann.com/Grips/MakingGrips.html


I could be wrong...but arnt ya supposed to let the wood dry...or "cure fer a few days first?

Yup, if you cut down a tree and whack off a slab of wood you need to control how fast it dries, too fast and it cracks. Seal the end of the grain and let it set in your garage for six eight months.
 
Last edited:
After you make the grips. If you have experience with wood. do a small drawing or a star or something. Then use some chisels and chisel it out. Then through the back of grips do a small counter sinc and drill a hole. Then put a screw through the grip make sure its small enough to go through the other side and stick out in the chiseled area but not too long to stick past. Now go put some pewter in a small pot. when its melted down good fill in the chiseled area. As soon as it cools down use some fine sand paper to sand it down to meet with the wood. Then stain and finish the wood. You will be suprised on how it will come out.
 
Sometimes the grips you have are good enough you just have to refinish them. On my 1858 i wanted some old aged up grips. So out came the blow torch and some shoe polish. then i rubbed it out and put a satin finish on it. After hitting it up and throwing some rocks at it.
Before
Picture005.jpg
After
CopyofPicture045.jpg
 
On my pietta 1851 after i stripped the finish i thought the grips just looked terrible. So after about 20 coats of hand applied and rubbed Black Lacquer here you go.

IMG_1897.jpg
IMG_1898.jpg
4Apr-31.jpg
4Apr-41.jpg
Original
100_0817.jpg
Picture023.jpg
 
The factory grips are one piece, but you can save a whole lot of time and effort making it in three parts like the previous poster suggested and it is not un-traditional either since this is the way the ivory grips were often made. To do these make sure to fit both halves to the frame first and leave a bit extra to extend past the other sides. Make the insert exactly the same width as the backstrap, coat all metal parts with release agent, and than epoxy the whole mess together being careful to keep alignment and clamp securely. I use a slow set epoxy for this and forget about it afterwards for at least a day. If you didn't get enough release agent on the parts the grips will be glued to the metal, you can often free it by sticking the gun in the freezer for a couple hours and than taking it out and using a bit of force (don't ask me how I know this). The rest of the task is to shape the grips and that takes some skill, but go slow and you should be alright if you study the originals.
 
1. Get a block of wood.
2. Remove everything that isn't a grip.

Why didn't I think of that? hahahah..... Some great info here, thanks. It's what I was looking for. I never realized the one piece grips on my guns were 3 pieces, but that makes perfect sense now. I'll have to give this a try soon with some black cherry burl I have. I bet making a stock for the Henry is a bit more challenging!
 
Actually, many of the one piece grips, including ivory, are just that, one piece. Colts and the Italians use mostly one piece grips on their SA revolvers. Many aftermarket one piece grips are three piece. The ones I make are three piece because it is much easier to makee the three pieces and fit them together. I use a Japanese pull saw, rasps, and sandpaper for tools. And a pencil. Sometimes a handplane to flatten the two halves to better meet the grip frame.

Another way to do it is to make two piece grips and hold them with a screw and escutcheon. I believe this is how Das Jaeger makes his beautiful grips.

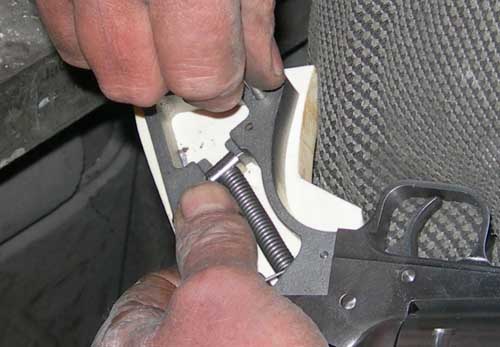
I will be cutting a set of grips for one of my 1860s after the Holydays, maybe I will take some photos and post them.

Let your imagination go for grip material. If you want traditional, think fruit woods like cherry or apple, nut trees like wlanut and pecan make nice grips also. So does maple and ironwood. I favor stag, but ivory is a good choice if available. Exotic woods, zebrawood, rosewood, etc are also good choices. Depepnds on your taste and what you want to do. Ebony and other dense woods shift the weight back into your hand and will counterbalance a muzzle heavy revolver.

Have fun.
 
Last edited:
RC is exactly correct.


Well, the plan was to take this nice piece of walnut and make a set of one piece grips for a Colt SAA, leave them over-size and offer them for sale.

But now, I see how nice the wood is and I may fit them to one of my Colts and keep em. ;)


DSC00217.gif

DSC00215.gif
Nice chunk of wood - I used a band saw to cut this much from a larger piece of wood and get the basic shape.

DSC00219.gif
chunk of wood cut in half - I used a back saw to separate the two sides. I used a belt sander to sand the inside of the two halves smooth.

DSC00223-1.gif

Left side starting to take shape. Going good so far if I don't screw it up. I use a Dremel to rough out the shape along with a sanding drum on my drill press and a lot of hand sanding. I do a lot of hand sanding so I can feel the shape. I can feel bumps and areas that don't transition quite the way I want them to.

I like to take photos of WIP as the camera "sees" things I don't see just looking at something. In this case I see a small area that I need to blend the curve a little more. The left side is only about 50% so far. Long way to go yet.

For me making grips is nice as I make em just a tad thicker than the factory grips.
 
Last edited:
In progress

I am currently working on a set with Olivewood.

(Sorry for the poor quality of the images...they're just from my cellphone)

Photo_120709_002.jpg
Photo_120709_003.jpg
 
jes,

What material are you using for the spacer? from the photo it looks like MDF and I owuld have not thought that to be reisitant enough to use.

Thanks
 
Yes, the spacer is just some fiberboard. I am using that to maintain position within the frame. I will use blind pins emoxyed directly into the handle for strength.
 
How it's done... a photoshoot

grips05.jpg

I have a Magnum Research BFR revolver (which is only shot on blackpowder!) which now has a set of custom grips made by a German guy. I did a complete photoshoot on how he did it. The text is in Dutch however.
The end result was absolute perfection.
For a Colt model a piece of wood is glued, as a spacer, between the two grips. this was not done with the BFR since it has a different frame, identical to Ruger's Super Blackhawk.

Click here:
http://www.twolefthands.nl/Zwart%20Kruit/BP%20Index/BFR%20custom%20grips/BFR_grips.htm

Hildo
 
@madcratebuilder.
You are right. Some things are just universal, no matter what language is used.
If you ever happen to get to Holland you're invited to give the BFR a go at the range here.

@JCT
The manufacturing process of these grips took close to 4 hours.
It is incredible to see two pieces of ivory transform into such a complex shape without any specialty tools like CNC machining or the like. This is true handcrafting, I love it and have great respect. This man is no beginner and has done many, many grips and it shows in the routine he was working with. The rough work went fast, the finishing touch took much longer. Over and over fitting them to the gun to check the dimensions without any measuring. It's all done on gut feeling. If you take away just a bit too much, it's over and you can toss them.

JCT, if you are going to make some grips yourself make sure you have enough time. Especially for a first time grip maker I think it will be a long process, just have patience, don't rush. If you have just a little feeling for working with your hands I think you'll be just fine.

Good luck.

Hildo
 
Thanks for all the great posts, I'm holding off on starting this until the new year. That's when I can get some walnut and cherry to play around with. I can see the basic shaping is straightforward, it's the details that take the time and can be tedious. I may start with some maple before I go buying expensive woods.....
 
Status
Not open for further replies.
Back
Top